Titan ReloadingLee PrecisionLoad DataMidSouth Shooters Supply
WidenersRotoMetals2Snyders JerkyInline Fabrication
Repackbox Reloading Everything

Thread: Making that Bullet Collator

  1. #6501
    Boolit Master GWS's Avatar
    Join Date
    May 2019
    Location
    New Mexico
    Posts
    1,370
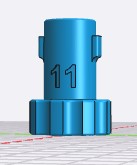
    I use TylerR's #11 long rifle bullet plate for long bullets and many other ones as well.....yes unchanged for skinnier calibers as well. Didn't seem to care.....wondering what you did exactly to change it? Or maybe you just need to increase the angle?


  2. #6502
    Boolit Mold
    Join Date
    Aug 2022
    Posts
    16
    I didnt change it. The collator plate itself worked ok, but 2ea 6mm bullets will fit in the slots (problem 1).

    The bigger issue is more with the long bullet slide plate. The angled ramp tends to drag the bullets down into the 'tray' (problem 2). I have it tilted at more that 45deg. The bullets also sometime tip over into the gap between the collator plate and the ramp in the slide plate. Were you using the #11 long bullet slide plate? Below is a video of what happens.


  3. #6503
    Boolit Master GWS's Avatar
    Join Date
    May 2019
    Location
    New Mexico
    Posts
    1,370
    I have not tried 243 that long.....but in the video it sure 'looks' like they are falling forward away from the "back" wall of the slot....and the ramp is finishing it off rather than flipping it. Maybe TylerR has an answer for you.

    I did have to use the second ramp during my first attempt at 30 caliber for some bullets....which tilting still more fixed. This whole thing is seat of the pants, trial and error for sure. The video below illustrates my first attempt and the sometimes double flip:

    Last edited by GWS; 07-04-2023 at 10:50 AM.

  4. #6504
    Boolit Mold
    Join Date
    Aug 2022
    Posts
    16
    Yea these bullets are long! �� I have a modified collator printing now with the slot width shrunk. The slides wont go all the way thru but there wont be much material there so I plan to either dremel it or use a box cutter. I think if I can get only one bullet on the slot, then I can make the ramp work. Will advise.

  5. #6505
    Boolit Master GWS's Avatar
    Join Date
    May 2019
    Location
    New Mexico
    Posts
    1,370
    Super Mario asked me by private message to explain the parts needed for a proximity sensor when mounted high under the collator rather than the method of using the long drop tube just above the bullet feeder die. I thought others might want info about that option, too, especially from those using Dillon's 1100 which can get crowded fast above the moving die plate. So here's what to do if you need it....First screw in the Drop Hole Adapter into the underside of the collator:

    make sure you mount this part with the locator hole facing the front of the collator so the prox will twist-lock rotated to the back when it's mounted. And the following prox housing and threads are then angled back so the bullets fall and ride against the sensor.

    Next print the Prox. housing and thread insert:


    Sip the housing and thread assembly over the downtube. The housing's tee, where the threads go in, should end up pointing to the back when the housing is slipped over the Down Tube and twist locked....make sure the two slots are down, toward the downtube, so that they slip over the downtube's knobs....
    It actually is easier to thread the thread insert into the Prox switch before you push the threads into the housing...Prox switch end should end up against the "flat" of the downtube....and the downtube will be angled so that bullets will ride down closest to the Prox.


    make sure you print the shorter "Alt" version of the Drop-Tube if it's going to be mounted above the spring....and print the one sized for your caliber. (for 9mm I use #11) The long version Drop-Tubes are so you can have a stack of bullets to feed near the bullet feeder die and the spring is therefore empty. IOW's the Prox switch fills the downtube then turns off. With it mounted high and above the spring...it turns off with the spring and shorter downtube full.....different totally.

    So once the prox in it's housing is dropped over the downtube, you can twist attach the downtube under the collator.
    Next mount the springtubing to the two tubing ends....the top one is pictured next....then the springtube....then the bottom one
    -Spring-

    These parts are numbered too....I found the #11's in those parts also worked best for the Spring I use for 9mm.

    Finally twist-lock the Spring-Drop-Tube-Medium to the drop tube bottom and the 9mm bullet feed die under that.


    The top opening in the 9mm bullet feeder die is just a little smaller than the Medium Spring drop tube adapter....so use a file, knife, or something to open the edge with a small bevel to prevent bullets from hanging there sometimes. Below...the finished interface to the press, showing the spring, the bottom spring adapter, the Spring-Drop-Tube-Medium-Adapter, and finally the bullet feeder die.


    And YES, the springtube will fill with bullets, but I've, so far, never seen a problem with that, if you use a good spring. This is the one I used for 9mm.....(you can stretch it so to see bullets inside or not....but don't stretch too much or the spring will catch bullet edges)

    What I used and like for 9mm: https://www.mcmaster.com/products/sp...-spring-stock/

    Last edited by GWS; 07-05-2023 at 05:06 PM.

  6. #6506
    Boolit Buddy
    Join Date
    Jan 2014
    Posts
    128
    That's exactly what I do, too. I have it up top, definitely for brass, but oftentimes for sizing bullets too.

    Sent from my Pixel 5 using Tapatalk

  7. #6507
    Boolit Master GWS's Avatar
    Join Date
    May 2019
    Location
    New Mexico
    Posts
    1,370
    Thought I'd share one more picture....and it might create a question or too since it isn't precisely what I preached already....notice the 9mm and the #10 spring end adapter. I said #11 in the last post. Well the one pictured here is another spring.....I recommend you print more than one size adapter and use the one that fits the spring you end up using best.......there's no absolutes.


    springs are different and each spring end adapter is different.....the #10's hole will be just a tad smaller than the #11. Then you have to deal with the part below it....and it comes in small medium and large. Well Medium as you see in the picture is used for both 9mm and .40, but .45 uses the Large......then the bullet feed die also has difference inside hole sizes from the other two parts. So pay attention, and if you have hanging bullets, try another spring end size, or chamfer the feed die's top hole so there's no ridges. (the little devil that ran my brain, the day I took this picture, put the .40S&W bullet feed die upside down just to confuse you and me. Sorry)

    And always, if you use a file, grinding stone or exacto knife to chamfer.....smooth the area with ACETONE. The goal is smooth sailing all the way for the bullets.....these are no final out of the box tools...you have just a little work to do, to finish things.

    Keep in mind, that there is not a lot of difference size wise between .40 and 9mm. So #10 or #11...#11 works fine for both, but #10 is too small for the .40.....I tend to go the least resistance with fewer parts.....

    Oh and what's that stuff using the #14 on the left? That's used for my RCBS Pro 2000 homemade case feeder.....45ACP version. Yeah, I use TylerR's collator for that too.

    Cast Boolits will be glad for me to retire from all this......look at all the bandwidth I hog.....
    Last edited by GWS; 07-05-2023 at 08:18 PM.

  8. #6508
    Boolit Mold
    Join Date
    Aug 2022
    Posts
    16
    I seem to have mostly fixed it. I did modify the collator plate. The changes were to change caliber to 6.2mm (vs the 7.82mm of the #11) in OpenSCAD. This did create a little artifact at the end of the slide 1 layer thick that I had to remove with a razor knife. The definitely solved the multiple bullet feeding issue. There were still some flipping issues.

    1.) The shallower slots for the bullets pushed the bullets past the lip of the slide tray so the base down (correctly oriented) bullets fell into the tray. I added a small screw in the back of the slide plate and adjusted until there was enough lip to keep them from falling.

    2) Bullets were still getting pulled into the tray. I found this is related to speed. If I slow the collator down, this seems to correct itself. I dont see this being an issue becaue I will be manually dumping powder on these rounds so the speed wont hurt.

    Once I get the rest of the kinks worked out, ill send another video.

  9. #6509
    Boolit Mold
    Join Date
    Aug 2022
    Posts
    16
    Here is my revised Long Rifle Collator plate running .223" 88gr ELD-Ms (very long 22 cal bullets). It runs my 6mm (243 cal) Berger 109 LRHTs great too. As mentioned, I did have to adjust the slide plate position.


  10. #6510
    Boolit Master GWS's Avatar
    Join Date
    May 2019
    Location
    New Mexico
    Posts
    1,370
    Success is fun! Congratulations! So what width did you end up with in the holes? And how did the slide position change....pulled it out how much?

  11. #6511
    Boolit Mold
    Join Date
    Aug 2021
    Posts
    10
    Hey guys I'm not great with FreeCad or any of the 3d software out there, does anyone know what the easiest way to remove 40mm from the center of the droptubes, and also make the bottom solid with a hole that's 13.5mm, I would like to attach the droptubes to the lee bullet feeder dies.

    Thanks

    Click image for larger version. 

Name:	image_2023-07-09_155235565.jpg 
Views:	7 
Size:	29.2 KB 
ID:	315803

  12. #6512
    Boolit Buddy Gillie Dog's Avatar
    Join Date
    Dec 2011
    Location
    Down South California
    Posts
    207
    I have adapted them to the Lee bullet feed dies in TinkerCad. The part below the window is a little shorter, the Lee dies differ in how much it sticking above the spring nut, and put a slit in them to allow adding a clamp if necessary. Also filled in the photo eye holes since I do not use them

    I have only tested three of them so far.

    If you wish I can send you one in .stl to test.

    Click image for larger version. 

Name:	Lee 9mm Drop Tube.png 
Views:	5 
Size:	43.3 KB 
ID:	315804

    Well since I had cut the #9 up to make a 12" tall one to test with more weight pushing the bullet into the case here is short ones.

    Click image for larger version. 

Name:	Short.png 
Views:	4 
Size:	155.8 KB 
ID:	315805

    GD
    Last edited by Gillie Dog; 07-09-2023 at 07:28 PM. Reason: Added Short Ones
    #2 member of the 10%ers

  13. #6513
    Boolit Mold
    Join Date
    Aug 2021
    Posts
    10
    Quote Originally Posted by Gillie Dog View Post
    I have adapted them to the Lee bullet feed dies in TinkerCad. The part below the window is a little shorter, the Lee dies differ in how much it sticking above the spring nut, and put a slit in them to allow adding a clamp if necessary. Also filled in the photo eye holes since I do not use them

    I have only tested three of them so far.

    If you wish I can send you one in .stl to test.


    GD
    Thanks that would be awesome !

  14. #6514
    Boolit Buddy Gillie Dog's Avatar
    Join Date
    Dec 2011
    Location
    Down South California
    Posts
    207
    Quote Originally Posted by Sgt Beer Belly View Post
    Thanks that would be awesome !
    Sgt,

    Attached 11mm Drop Tube for you to test.

    Cannot for the life of me figure out how to send stuff in private messages, probably can not.

    GD

    PS: Have not tested that one. Looks good in Cura slicer.

    Both Lee 11mm Drop Tube II.zip
    Last edited by Gillie Dog; 07-10-2023 at 02:30 PM. Reason: Added PS:
    #2 member of the 10%ers

  15. #6515
    Boolit Mold
    Join Date
    Aug 2021
    Posts
    10
    Quote Originally Posted by Gillie Dog View Post
    Sgt,

    Attached 11mm Drop Tube for you to test.

    Cannot for the life of me figure out how to send stuff in private messages, probably can not.

    GD

    PS: Have not tested that one. Looks good in Cura slicer.

    Both Lee 11mm Drop Tube II.zip
    Gillie I farted around a bit was also able to make one on Tinkercad, I added tabs for screws incase anyone wants to try it
    Attached Files Attached Files

  16. #6516
    Boolit Buddy Gillie Dog's Avatar
    Join Date
    Dec 2011
    Location
    Down South California
    Posts
    207
    You are off and running now, have fun............

    GD
    #2 member of the 10%ers

  17. #6517
    Boolit Bub
    Join Date
    Apr 2018
    Posts
    60
    Sorry for short notice Amazon has overture PLA pro for $16-18/roll for next few min. I got some Dillon blue for $31 for two pack.

  18. #6518
    Boolit Mold Super_Mario's Avatar
    Join Date
    Jun 2023
    Posts
    4
    Is anyone able to share the spring adapter thread specs for a size 11 adapter. I am braving into the world of playing with modifying stls and would like to play with modifying a drop Tube and want to attempt adding threads.
    Last edited by Super_Mario; 07-13-2023 at 09:59 PM.

  19. #6519
    Boolit Master GWS's Avatar
    Join Date
    May 2019
    Location
    New Mexico
    Posts
    1,370
    Quote Originally Posted by Super_Mario View Post
    Is anyone able to share the spring adapter thread specs for a size 11 adapter. I am braving into the world of playing with modifying stls and would like to play with modifying a drop Tube and want to attempt adding threads.
    TylerR is the best at making threads....you may have to be patient as he is hooked up to his eyebrows with youth league baseball coaching right now. But that's probably going to end fairly soon. That said, modifying .stls to add threads is something I would not take on....don't even know if it can be done. Source code before they are made into .stls, is another thing....very possible.

    But the first bit of info we need is which software you are using to make the cad file......I've been using his spring-end adapters that have worked for everything I have needed....what are you needing different? One more thing I will say is that he has told me that it took a lot of trial and error.....until he found the right mix of specs. Software-wise I think he has used Design Spark Mechanical to make them and such isn't too convertible to other software......I had to learn DSM so to be able to modify.....cut and paste....and so on......there are lots of how-to's on the web on making threads....I've probably tried them all. Some work better than others....can of worms to be sure. I'm sorry to say, I did not document anything too well....Press tool head threads there is some, but you'll have to ask TylerR on the springs-ends he made.
    Last edited by GWS; 07-14-2023 at 09:40 AM.

  20. #6520
    Boolit Mold Super_Mario's Avatar
    Join Date
    Jun 2023
    Posts
    4
    That’s extremely helpful. To be quite honest, I hadn’t really settled on a software which is probably the first issue. I had been playing with tinkercad and then started playing with fusion 360 free version and I’m still lost in the sauce.

    As for what I’d like to do? Primarily tinker, when I got into 3d printing I never thought I’d want to do any design work but with this project, I’d like to create my own drop tube, play with diff proximity sensors, which is resulting in me looking at how I create a thread or design the spring adapter design so I could then have all these parts mate up to my own drop tube.

    I guess to answer the question, mostly I just want to tinker and everything else seems a little straight forward. Threads and designing these mounts however seems a little over my head, but I’d like to learn.

Posting Permissions

  • You may not post new threads
  • You may not post replies
  • You may not post attachments
  • You may not edit your posts
  •  
Abbreviations used in Reloading

BP Bronze Point IMR Improved Military Rifle PTD Pointed
BR Bench Rest M Magnum RN Round Nose
BT Boat Tail PL Power-Lokt SP Soft Point
C Compressed Charge PR Primer SPCL Soft Point "Core-Lokt"
HP Hollow Point PSPCL Pointed Soft Point "Core Lokt" C.O.L. Cartridge Overall Length
PSP Pointed Soft Point Spz Spitzer Point SBT Spitzer Boat Tail
LRN Lead Round Nose LWC Lead Wad Cutter LSWC Lead Semi Wad Cutter
GC Gas Check